Perfect Lash Isolation: Essential Techniques for Flawless Extensions
Isolating lashes during the eyelash extension process may seem minor, but it's incredibly important. As a lash technician, you understand that achieving flawless isolation is crucial for achieving impressive results and keeping clients satisfied. Now, we'll explore the details of lash isolation, dissecting the procedure, and revealing techniques to enhance your lash expertise.
What is Lash Isolation?
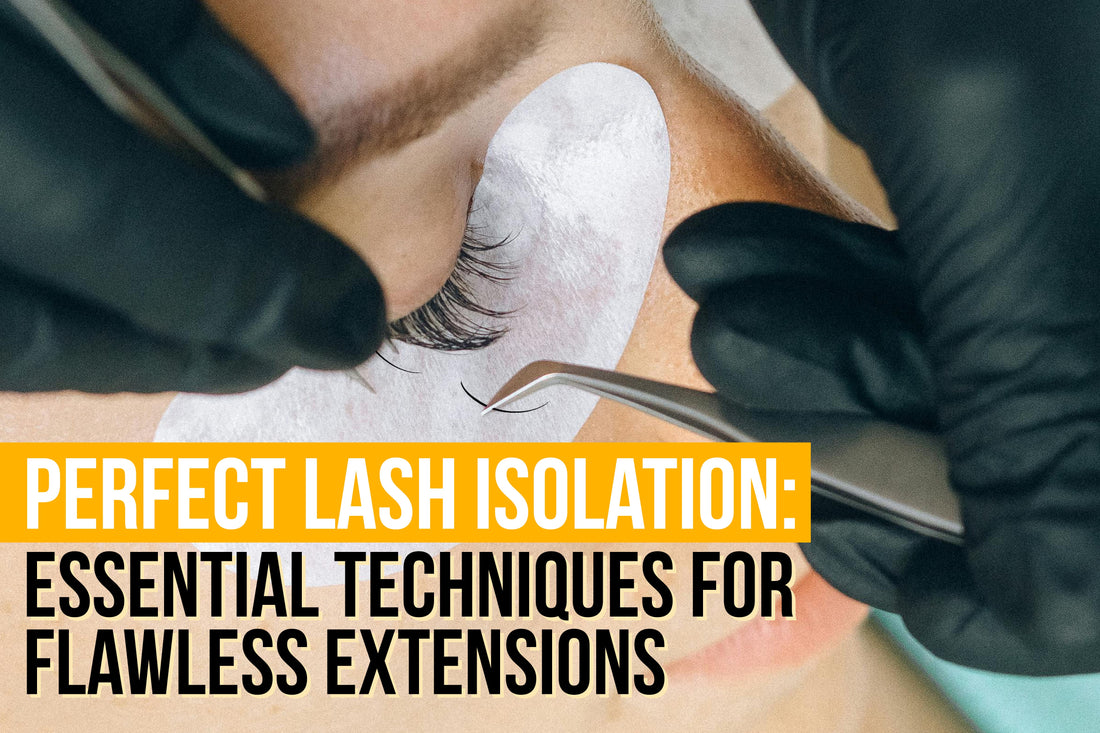
Lash separation is an important step in the eyelash extension application procedure. It entails meticulously isolating a single natural lash from the surrounding lashes, making sure each lash is isolated and ready to receive the lash extension. This isolation technique ensures precise and seamless placement of the lash extension for a flawless finish. Although it may appear easy, lash isolation is essential for creating beautiful and long-lasting lash extensions.
What are the Benefits of Isolating Lashes?
So, why's lash separation such a big deal? It plays a vital role in protecting your client's natural lashes. Proper isolation prevents lash extensions from clumping together and tugging on each other, which can cause premature lash shedding. This technique also promotes better adhesion, leading to longer-lasting and fuller-looking lashes. Isolating lashes safeguards your client's natural lashes and guarantees flawless results for your client’s lash extensions.
Tools for Isolating Lashes
To become a pro at isolating lashes, it's crucial to have the right tools in your lash kit. Here are the essential tools you'll need:
-
Tweezers: Choose lightweight and comfortable tweezers with a precise grip. This will make it easier to maneuver and isolate individual lashes effectively.

-
Micropore Tape (Optional): This tape can be a game-changer for dealing with stubborn lashes. It gently secures nearby lashes, providing a clear view of the lash you are working on.

-
Eye Gel Patches: These patches not only protect your client's lower lashes from adhesive but also provide hydration during the application process.

-
Lash Mirrors: These mirrors act as extra eyes, helping you ensure that every single lash is properly isolated.

Step-by-Step Guide to Isolating Lashes
Ready to step up your isolation game? Now, let's dive into a step-by-step guide on how to isolate lashes:
- Ensure that your client's lashes are thoroughly cleaned and free from oils or makeup. Organize your workstation so that all your tools are within arm’s reach.
- Hold the tweezers as if you are holding a pencil and rest your pinky on the client's cheek for stability.
- Use your tweezers to separate a single, natural lash away from its neighbors. Precision is key here.
- Once you've isolated the lash, make sure to keep it separated as you pick up and apply the extension. You may need to use another pair of tweezers for this step.
Mastering lash isolation takes practice and patience but when equipped with the right tools and techniques, you can achieve flawless results.
Advanced Techniques for Isolating Lashes
As your technique gets sharper, you can unlock new possibilities with advanced isolation methods. These will help you design stunning, customized sets that flatter your clients' unique features. Buckle up and get ready to take your lash artistry to the next level!
Volume Lashes: For volume lash applications, achieving a flawless, full look relies heavily on meticulous isolation. Each natural lash needs to be separated precisely to ensure it can support the weight of multiple extensions comfortably.
Layering Techniques: Layering techniques offer another path to stunning results. By carefully isolating lashes in different growth stages (usually 2-3 layers), you can create a more natural and dimensional effect. Imagine crafting a beautiful, multi-layered look that enhances your client's eyes.
How to Isolate Lashes in Layers?
Layering techniques offer a way to create more natural and dimensional results. This advanced method involves isolating and applying extensions to different lash growth stages. Let's explore how to unlock the secrets of beautiful, layered lashes. Here’s a simple guide for you to follow:
- Place the bottom eye pads close to the skin for contrast with the top lash layer.
- Apply a second pair of gel eye pads over the top lashes, ensuring you can still see your mapping.
- Isolate the Top Layer
- Hold your tweezers in a horizontal position.
- Gently glide your tweezers along the top layer of lashes to lift and separate them.
- Lightly lift the client's eyelid with a finger for better visibility.
- Be careful not to pinch or pull out the lashes. You simply want to separate them.
- Use a lash mirror while the eye remains closed to verify that the lashes are appropriately isolated.
Additional Tips:
- This technique is safe for your client if performed gently.
- You can utilize this method during a lash fill, but take extra care when removing extended lashes to avoid disrupting the bond.
- For clients with very straight lashes, apply micropore tape to the outer and inner corners of the lid, lifting slightly to facilitate a better angle for extension application. Ensure that the client's eye remains closed throughout this process.
What happens if you don't Isolate the Lash?
Lash isolation might seem like a minor detail, but it's actually crucial for healthy, beautiful lash extensions. Here's what can happen if you skip this step:
-
Damage to Natural Lashes: When multiple natural lashes are glued together (often referred to as "stickies"), they can become weak and break prematurely. This is because lashes grow at different rates, and clumping them together disrupts their natural shedding cycle. Over time, this can lead to significant lash loss and damage to the follicles, potentially hindering future lash growth.
-
Discomfort and Irritation: Lashes that are stuck together can feel uncomfortable and scratchy on the client's eyelids. Additionally, the adhesive used for extensions can irritate the skin if it comes into contact with the eyelid instead of adhering to an isolated lash.
-
Unnatural Appearance: Lashes that are clumped together can create a bulky, unnatural look. The extensions won't adhere properly to individual lashes, leading to uneven spacing and potential gaps in the lash line.
-
Reduced Retention: Proper isolation ensures the adhesive bond between the extension and the natural lash is strong and secure. When lashes are stuck together, the adhesive surface area is reduced, leading to poorer retention and the extensions falling out prematurely.
By taking the time to isolate each lash meticulously, you can ensure a comfortable, long-lasting, and natural-looking lash extension experience for your clients.
Final Thoughts…
Lash isolation might seem like a small detail, but it's the secret behind healthy, glamorous lashes. It's like giving each lash a personal bodyguard to prevent breakage and ensure a strong, comfortable bond with the extensions.
By mastering this technique, you'll not only elevate your lash artistry but also leave your clients feeling confident and fabulous with their show-stopping lashes. Remember, practice makes perfect, so keep honing your isolation skills and you'll be a lash extension pro in no time!
For a flawless finish, explore our lash primers and adhesives formulated for long-lasting wear and gentle application. Remember, healthy lashes are beautiful lashes – choose the right tools and techniques to create stunning looks for a beautiful life!